Introduction
In this post, a demonstration on how to perform unit testing in Microsoft Visual Studio is covered. The demo is structured as follows:
- create a console app with accompanying c sharp classes, and
- perform unit testing on the methods used in the created classes.
In writing a program, implementing unit testing is a key step. The unit test project can be thought of as a document which can be used to understand the functionality and expected outcomes of the code. It is good practice to test the methods used in a program to check that the program delivers the expected results, and in performing the tests errors in the code can be picked up and corrected.
It often occurs that in the production process, a program needs to be extended. In extending the program, the results from one method should not alter the functioning/outcome of other methods. When unit testing is in place, errors can easily be picked up if it were the case that adding new code altered the outcome of existing working code. In this way, the existing working code is validated again when new code is added to the project. Using unit testing therefore serves as an important quality check of a program in the production process.
Creating a Console App (.Net Framework)
As an example in this demo, the construction of a calculator will be used. A CalculatorApp will be created, and unit testing will be performed on the methods that the CalculatorApp uses to validate that the methods used by the CalculatorApp work as intended.
Creating the CalculatorApp:
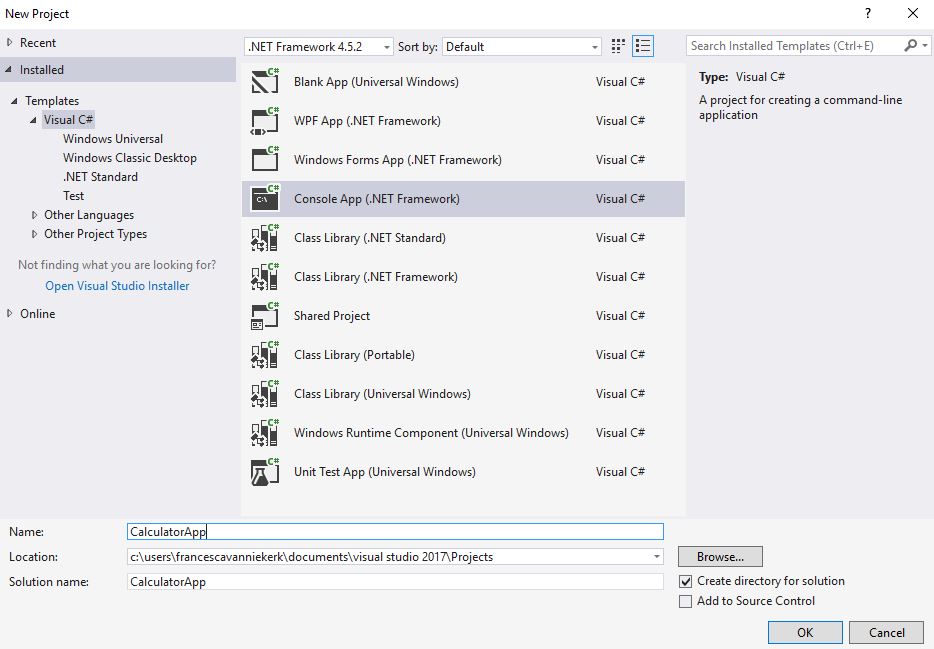
- In Microsoft Visual Studio, select File – New – Project.

- Under the New Project window, select the Console App (.Net Framework) under Installed –Templates – Visual C# and name the project CalculatorApp.
A CalculatorApp project will be created which contains a Program.cs file, this file will be used to communicate with the console. The result printed to the console will be the value returned by a method of a Calculator class. The next section covers the creation of the Calculator class.
The Calculator class
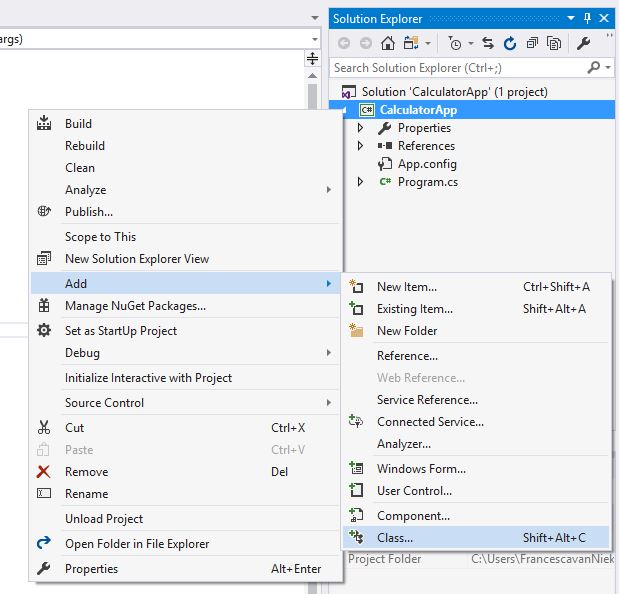
A class for a calculator object is created by adding a class template item to the CalculatorApp project.
- Under the Solution Explorer tab, right-click on the CalculatorApp project icon and select Add – Class.
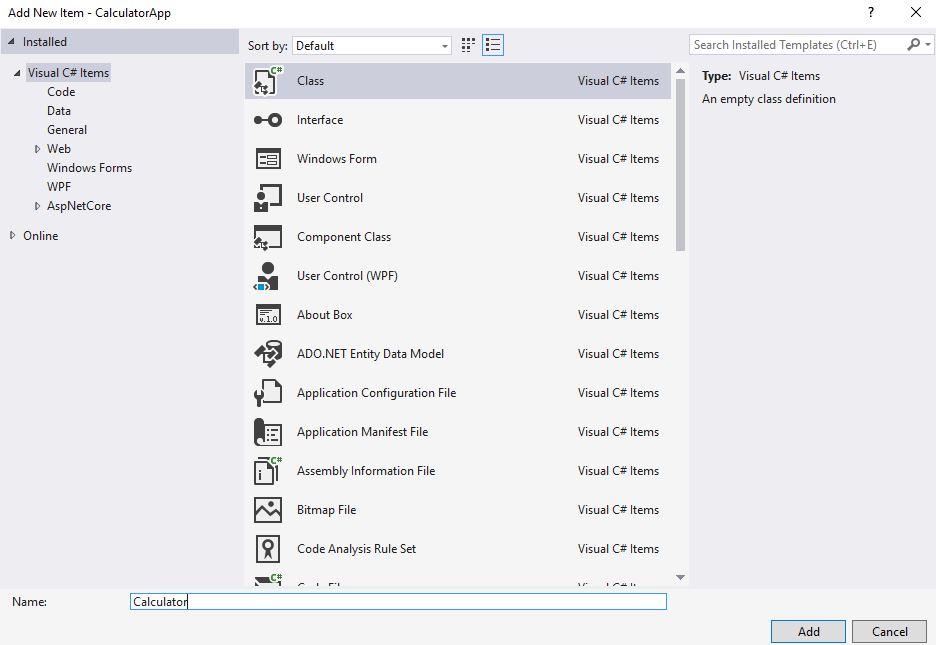
- Secondly, under the Add New Item window, name the class Calculator.
We are now interested in writing methods for the created Calculator class, in this demo a Plus method will be written. (This example can be extended to cover other methods such as Minus for the subtraction operation etc., but for simplicity only the addition operation will be discussed.)
The Plus method
The Plus method is specified to have two input arguments namely a and b, which are specified as type double. The Plus method returns a double, and the value it returns is the addition of the input arguments (a + b).
The code for the Calculator class (Calculator.cs):
using System;
using System.Collections.Generic;
using System.Linq;
using System.Text;
using System.Threading.Tasks;

namespace CalculatorApp
{
    public class Calculator
    {
        public double Plus(double a, double b )
        {
            return a + b;
        }
    }
}
The Program.cs file
We would like to display the result of the Plus method of the Calculator class on the console, the code to display this result is written under the Program.cs file.
The following is included in the Program.cs file:
- the two input arguments a and b are specified,
- a new Calculator object is created and named calculator,
- a variable result is specified as the return value of the Plus method of the newly created calculator object with input arguments a and b, and
- lastly, the statement to write the result to the console is written.
The code for the console app (Program.cs):
using System;
using System.Collections.Generic;
using System.Linq;
using System.Text;
using System.Threading.Tasks;

namespace CalculatorApp
{
    class Program
    {
        static void Main(string[] args)
        {
            double a = Double.Parse(args[0]);
            double b = Double.Parse(args[1]);

            Calculator calculator = new Calculator();

            double result = calculator.Plus(a, b);

            Console.WriteLine(result);
        }
    }
}
Run the CalculatorApp
To run the program, values for the input arguments need to be specified, this is done as follows:
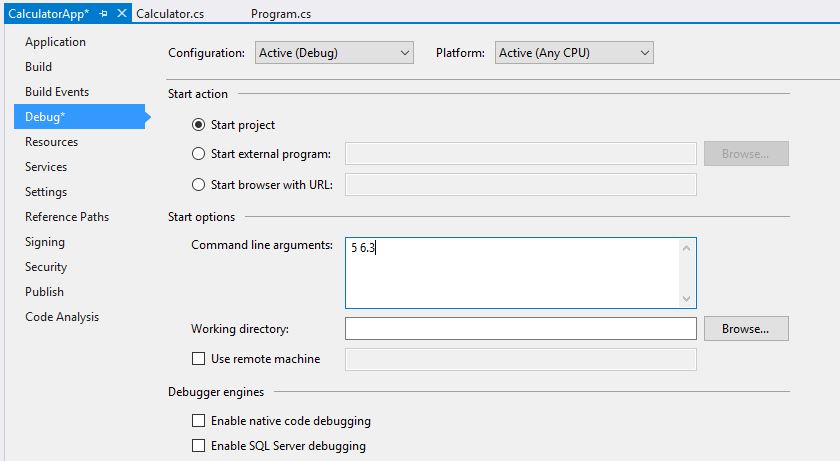
- Under the Solution Explorer tab, right-click on the CalculatorApp project icon and select Properties.

- Secondly, under Debug – Start options – Command line arguments:, enter values for the input arguments a and b. In this demo, the input arguments are chosen as a=5 and b=6.3.
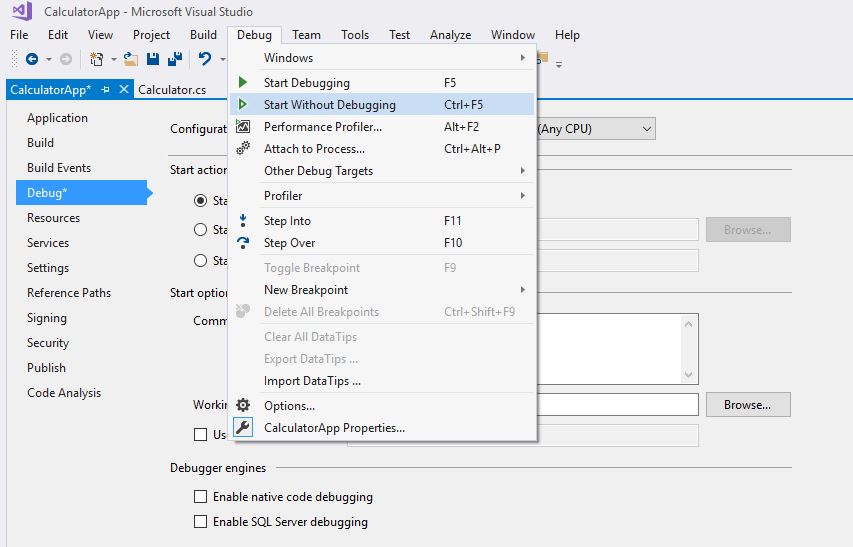
- Lastly, run the program by selecting Debug – Start Without Debugging from the main ribbon.
The console will be run and be displayed as follows:
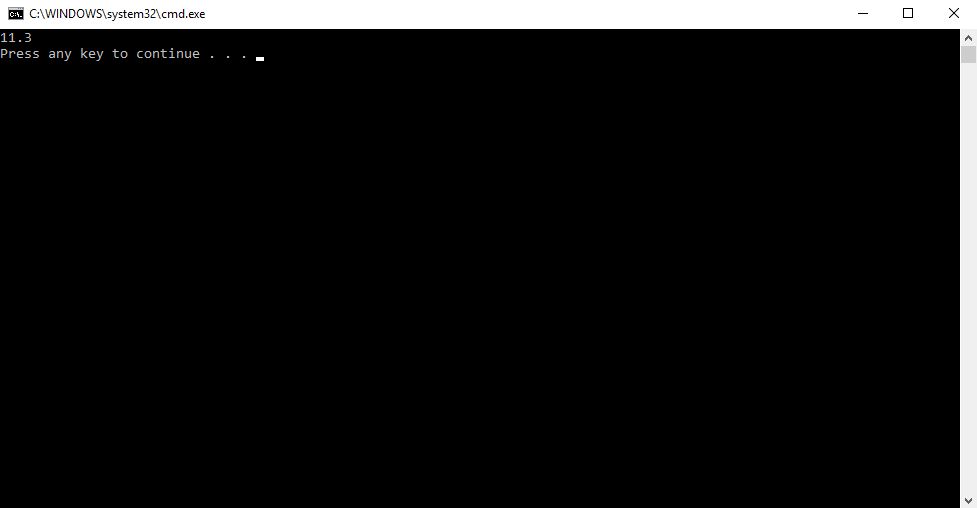
The result displayed on the console is 11.3 as expected.
Testing the CalculatorApp
The following steps are taken to test the CalculatorApp:
- firstly, the following tools namely NUnit 3 Test Adapter and TestGenerator are installed which will be used to create the tests project,
- secondly, a CalculatorAppTests project is created and the code used to test the CalculatorApp is written, and
- lastly, the tests are run to check for any errors.
Installing the NUnit 3 Test Adapter and NUnit3.TestGenerator tools
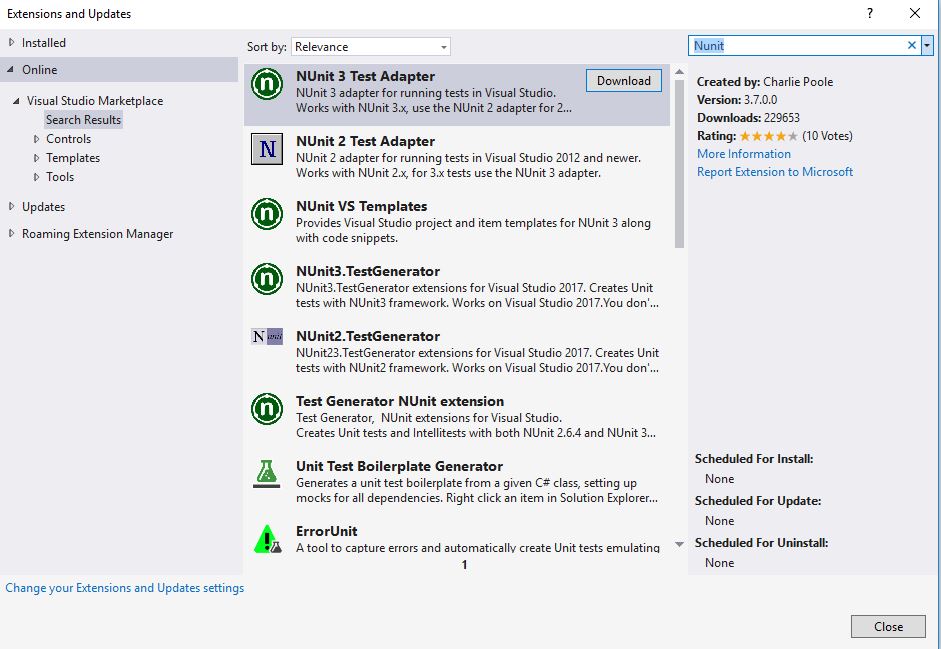
- From the main ribbon select Tools – Extensions and Updates.

- Search for “Nunit” in the search bar under Online, and download and install Nunit 3 Test Adapter and TestGenerator.
Create the CalculatorAppTests project and the PlusTest method
In this example, we are interested in testing whether the Plus method under the Calculator class works as intended. A test is used to validate the Plus method, and is created as follows:
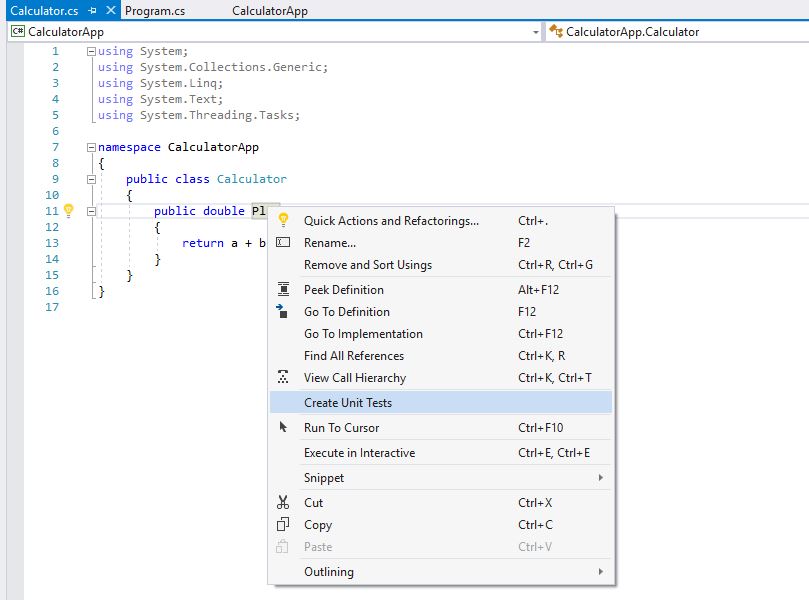
- In the Calculator class file (Calculator.cs), right-click on the Plus method and select Create Unit Tests.
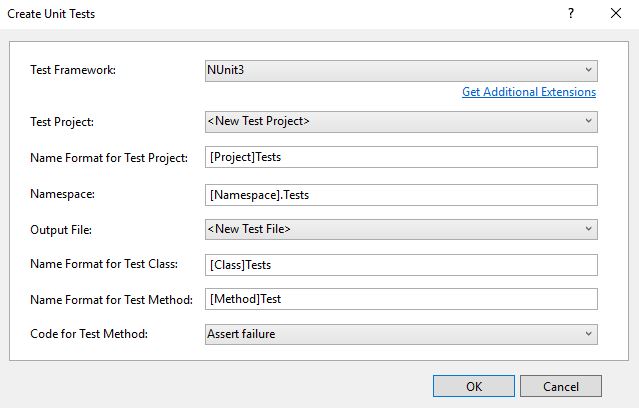
- Under the Create Unit Tests window, the Test Framework needs to be specified. Under the Test Framework option select NUnit3 from the dropdown menu.
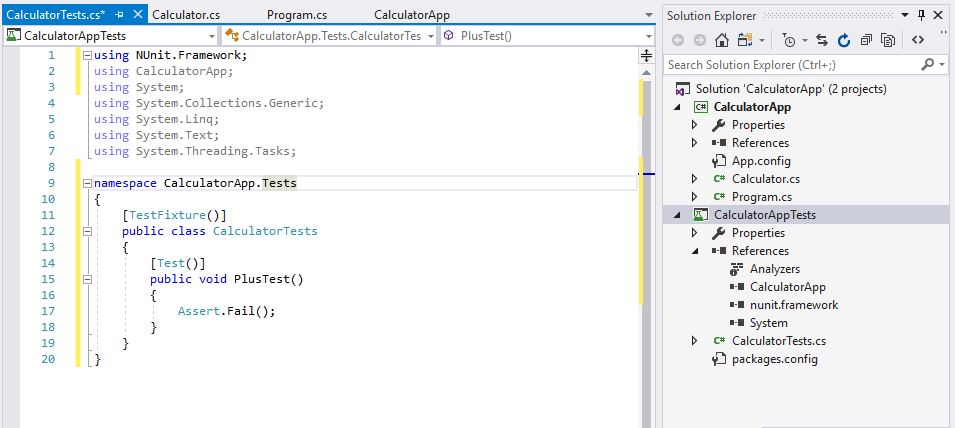
A CalculatorAppTests project will be created and a class CalculatorTests will be generated to use for testing the Plus method.
The PlusTest method
The PlusTest method in the CalculatorTests class needs to be modified. The PlusTest method uses static methods (assertions) from the Assert class of the Nunit testing framework. The conditional operator method AreEqual under the Assert class is used to test whether the expected result from the Plus method is equal to the actual result when the Plus method is run.
The PlusTest method code:
- the following two variables are created: expectedResult and actualResult, and
- the conditional method AreEqual under the testing class Assert is used to test the Plus The input arguments for the AreEqual method are the two variables expectedResult and actualResult.
The code to test the Plus method (CalculatorTests.cs):
using NUnit.Framework;
using CalculatorApp;
using System;
using System.Collections.Generic;
using System.Linq;
using System.Text;
using System.Threading.Tasks;

namespace CalculatorApp.Tests
{
    [TestFixture()]
    public class CalculatorTests
    {
        [Test()]
        public void PlusTest(double a, double b, double expectedResult)
        {
            a = 5;
            b = 6.3;
            expectedResult = a + b;

            Calculator calculator = new Calculator();
            double actualResult = calculator.Plus(a, b);

            Assert.AreEqual(expectedResult,actualResult, "The expected result was {0} , using a={1} and b={2}, but the actual result was {3}",
               expectedResult, a, b, actualResult);

        }
    }
}
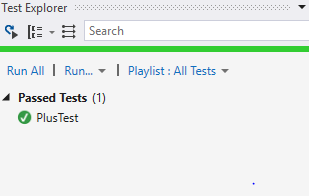
The test is now run by selecting PlusTest and on the main ribbon selecting Test – Run – Selected Tests. When the test has run, under the Test Explorer tab PlusTest should be displayed with a green circle and tick under Passed Tests as seen below:
If the test fails, i.e. the expectedResult was not equal to the actualResult, then one knows that there is an error in the Plus method code and it needs to be fixed.
Testing multiple scenarios using the Assert class
The Assert method only runs for one scenario, to run multiple scenarios the following method can be followed:
- Create a method called PlusAssert which has input arguments a and b. The PlusAssert method performs the plus test for one set of inputs. (In addition, a message can be included in the Assert method, which helps in understanding an error if the Assert method fails.)
- Adjust the PlusTest method, such that the PlusTest method runs the PlusAssert method for different sets of inputs.
The code follows below:
public void PlusTest()
{
   PlusAssert(5, 5, 10);
   PlusAssert(-4, 7, 3);
}

private void PlusAssert(double a, double b, double expectedResult)
{
    expectedResult= a + b;

    Calculator calculator = new Calculator();
    double actualResult = calculator.Plus(a, b);

    Assert.AreEqual(expectedResult, actualResult, "The expected result was {0} , using a={1} and b={2}, but the actual result was {3}", expectedResult, a, b, actualResult);
}